
Howto: Upgrade SCCM 2012 RTM to R2 - Part 1
In this series of blogs I'll explain the steps that need to be taken to upgrade your SCCM 2012 environment successfully to the latest version - R2.Take note that their will be a lot of screenshots and text, that is why it's split up in multiple parts. It's only possible to migrate from RTM to R2 by first upgrading to SP1. You cannot upgrade directly! So this blog is about upgrading to SP1.
First off, I recommend you to check this checklist for prerequisites prior to upgrading your SCCM 2012 environment:
http://technet.microsoft.com/en-us/library/jj822981.aspx#BKMK_UpgradeSP1Checklist
Once you've checked this checklist, we can start.
In the example, we have a server which is running SCCM 2012 RTM, with MDT 2012 and SQL 2008 R2.
Step 1: Make sure there is a backup or snapshot of your server. If this is the case, you can continue.
Step 2: We start off with upgrading the SQL server by installing SP2. Start the setup.exe.


Step 10: You can view the progress

Step 11: Once complete, Setup will notify you. Click Close.

Step 12: Next we will install Cumulative Update 8 (CU8 / KB2871401)

Step 13: Once the files are unzipped, click Ok


Step 18: Wait for the files in use check to finish


Step 19: Ready to update, click on Update to start


Step 21: Once finished, Setup will inform you. Click Close


Step 24: Next we remove the Windows Automated Installation Kit (WAIK)


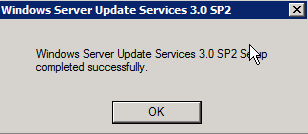
Step 26: Next we will install SP2 for WSUS 3.0 and the other hotfixes (KB2720211, KB2734608, KB2828185)


Step 27: Now we will let the SCCM SP1 setup prerequisite check run (don't run setup but open it from the SMSSETUP\BIN\X64 folder


Step 28: Once the prerequisites have passed, you can start setup by running splash.hta


Step 29: Use CMTrace to check if the upgrade has been successful.


No comments:
Post a Comment