
Howto: Upgrade SCCM 2012 RTM to R2 - Part 2
In the previous blog, we discussed the steps that are necessary to take when upgrading SCCM 2012 RTM to SP1, prior to upgrading to R2.Once the upgrade to SP1 is successful, you can proceed with upgrading to R2.
Make sure there is a backup or snapshot created before starting the upgrade process!
Step 1. Strange as it sounds, the freshly installed ADK can be removed again. We now need to install Windows ADK 8.1


Step 2: Install ADK 8.1


Step 4: Now we can start the prereq check from the setup folder (don't run setup but run the prereq checker standalone)


Step 5: When the prerequisites are okay, the setup to upgrade R2 can be started by starting splash.hta


Step 6: Check the rcmctrl.log with CMtrace to see if the upgrade went well.

Step 7: Once finished, you can start with the installation of hotfix KB2905002


Step 8: Once the hotfix is installed, reboot the server.
Step 9: Now we can start to upgrade the Microsoft Deployment Toolkit 2012 to version 2013


Step 10: Once MDT is upgraded, don't forget to recreate your boot images! Also recreate the normal SCCM boot images.
Step 11: Check if all Components are up and running. If not, try to resolve the issues.


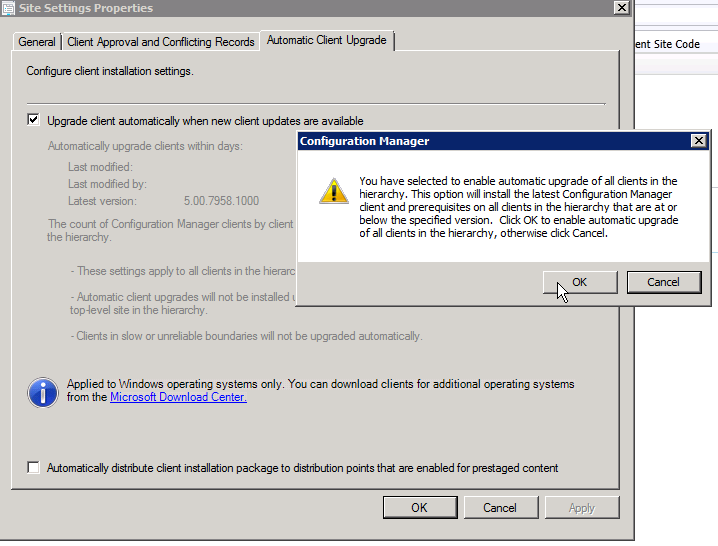
Step 13: Distribute the content for the KB2905002 client update packages, and turn on the automatic client upgrade


SCCM 2012 has now been upgraded successfully to 2012 R2!
No comments:
Post a Comment