Showing posts with label Windows 8. Show all posts

Thursday, January 23, 2014

Howto: Deploy Wifi profiles with SCCM

In this post we are going to discuss the possibility of deploying Wifi profiles using SCCM. We are not going to cover the built-in possibility of the distribution of Wifi Profiles in SCCM 2012 R2, because this is limited. We will cover this in a future post.

To start, we have to download a little application called WirelessKeyView.
We will use this little tool to export and import the Wireless profile(s).

Once downloaded, run this tool on a reference machine. Open a command prompt, and key in: wirelesskeyview.exe /export C:\temp\wifi.txt

This will export the profiles to a text file in C:\Temp.

Now copy the text file and the files for WirelessKeyView to your SCCM server (preferrably to the location where the rest of your applications/packages reside).

Now create a batch file with the following commands:
 copy wifi.txt %ProgramData%
WirelessKeyView.exe /import "%ProgramData%\wifi_.txt"
exit /b 0
What this script will do is that it will copy the wifiprofile to your ProgramData directory. The second line will make sure the profile is imported.

Now you can create an application in SCCM which will deploy the above. You can point the detection method to the Programdata\wifi.txt file. Make sure you run the application in the 'user context'.

Thursday, November 28, 2013

Top 5 new features in Windows 8.1


Windows 8.1 is RTM


Windows 8.1 is out now for a couple of weeks.

So what has been changed in Windows 8.1 in regards to its predecessor Windows 8? Below you will find a top 5 listed!

On 1: The Start button has returned!

1. Start ButtonOn of the big boos of the users that migrated to Windows 8 was the missing Star button. Now in Windows 8.1 it has returned. However, notice that it's only the button. The old-skool menu hasn't returned, it still opens the Metro UI Start menu.


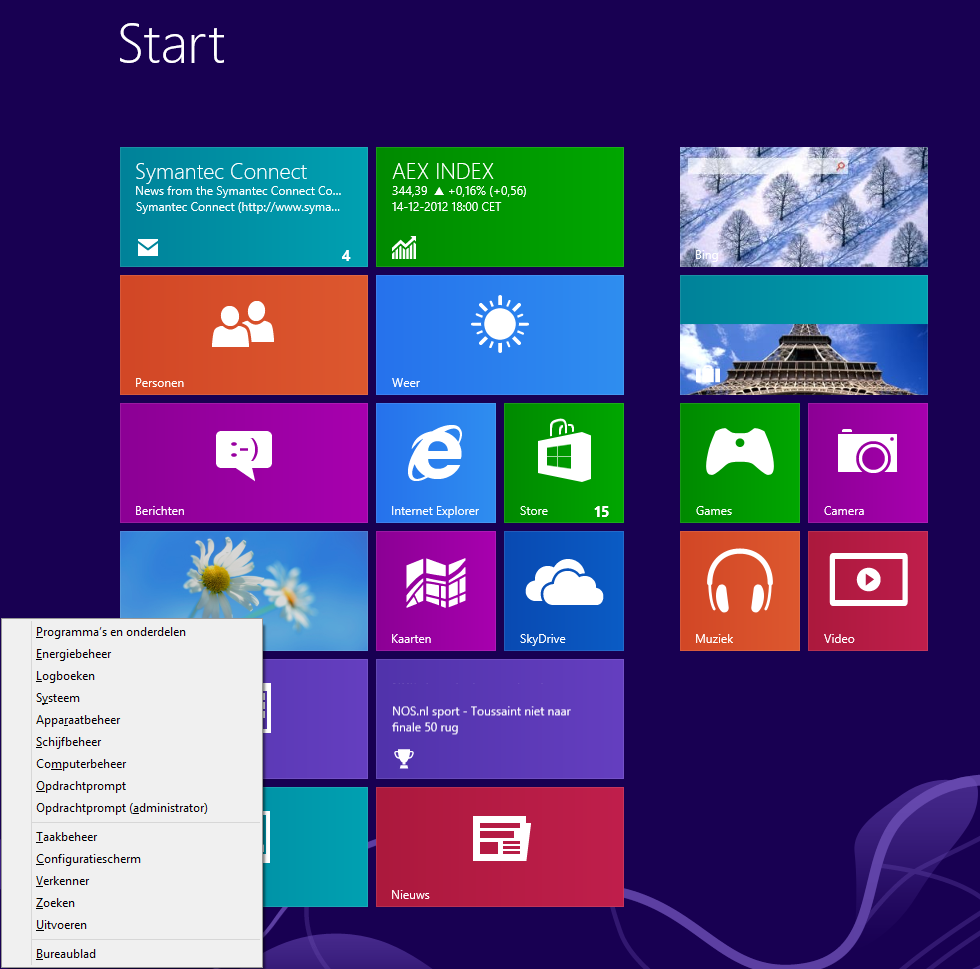
Also when you rightclick the start button, it opens a new small start menu, which is similar to the Windows + X shortcut you could use in Windows 8.

On 2: Boot to desktop


2. Boot to Desktop Another option is to boot directly to the desktop after the computer has started, instead of showing the Metro UI Start menu. This was also a wish of the old skool users, which were used to the Desktop.


On 3: ImprovedSearch

 
The search possibilities have been improved greatly in Windows 8.1. When you search for certain things, the relevant links will be shown directly. Also the apps that can be used to open it will be showed directly. For instance, Media Player to open music or Internet Explorer to open the links.
 

On 4: More possibilities for showing windows

There are now more possibilities in showing content on your screen. It can be split in half, or with a sidebar (1/4 and 3/4 of your screen). If you own a multi-monitor display setup, it is now possible to show 8 apps at a time. 4. More Windowing Options for New-Style Apps
 

 On 5: More robust settings

There are more settings available in the PC settings menu then previously. Think about settings to change for your Display, mouse, keyboard, autoplay, account etcetera. Also, you can find CPU / Memory information, and much much more! 6. More Robust Settings in Modern Interface

Wednesday, April 3, 2013

Hyper-V - How to create a virtual machine

This blog describes the steps on how to create a virtual machine in Hyper-V. See this blog for more information on enabling Hyper-V in Windows 8. 

The required steps are the following:

1. Open the Hyper-V Manager using the start menu (type 'Hyper-V').

2. The Hyper-V Manager is opened. Go to Actions, to create a new virtual machine:
3. A wizard will appear. Click Next on the first screen. On the second screen you can give your virtual machine a name:
 
 
4. After giving the VM a name, click next to get the next screen. Here you can assign the amount of startup memory for your machine. We have chosen for 2 GB in the example.

 
5. Click Next again and Next to set an optional networkconnection (these settings can be altered later on if neccessary).
 
 
6. Click Next again to setup the settings for your virtual hard drive.
 
 
7. Again click next to setup the installation options. You can choose to boot from the network, load an iso or other bootable media, or to skip this step for now.  
 
 
8. Click next again for a summary of your settings, and click finish to end the wizard. 

 
9. You will return to the Hyper-V Manager. Here you will find an overview of all your virtual machines. Right-click your created machine, and click on Connect...
10. Now you will see the screen below. Here you can start, inspect, shut down and snapshot your virtual machine.


11. Press the on/off switch to start the computer. With the 'media' menu you can insert an iso to install Windows or Linux(as an example)


Free Hyper-V in Windows 8! How do I enable this?

Like some of you might already know, Hyper-V is a free feature in Windows 8 nowadays! This will save you an expensive VMWare license. The only thing what you need is to activate the feature (and also you'll need a computer with VT technology). Here's how:

1. Go to the Control panel, and browse to Programs and Features. 
   
2. Choose "Turn Windows features on or off"


3. Check the box in front of Hyper-V, and klik OK. Navigate through all the questions, and reboot your computer at the end when asked.


4. Once booted back up, you can find the Hyper-V applications in your Start Menu, when looking for "Hyper". Here is what you will see:
 
With the Hyper-V Manager you can create and manage new VM's!

Thursday, March 28, 2013

Windows 8 shortcuts

Windows 8 is on the market for some time now, but despite that fact, some users still find it hard to get used to the interface. For some, the absense of the Start menu is a reason not to upgrade. But no worries! Hopefully after reading this blog, a world of user friendliness will be opened.

To navigate quickly within Windows 8, it's useful to make use of shortcuts. Below you can find some shortcuts documented: 

When you press the Windows button, you can switch between the program that is currently running, and the application list:


Windows 8 Start screen
When you scroll your mouse in the start screen, you will navigate left or right. Once you start typing the name of an application, for instance "Oult", then Windows will search for programs with that phrase in their name. This way you can open programs really fast and easy.

Press Windows + C for the so called 'Charms bar'. This menu is what opens on the right side of your screen, it also opens when you move your mouse to the right bottom corner of your screen.

Press Windows + I to go quickly to the 'Settings' screen. Here you will find 'PC Settings', 'Personalization', and 'Control Panel'.

If you quickly want to see all your Apps, then press Windows + Q.

To search quickly for files, press Windows + F.

When you have connected an extra monitor, to extend or dulicate your monitor, or use a beamer, then this combination will show you your options: Windows + P.

If you want to lock your screen for security reasons? Then press Windows + L.

Quickly open Windows Explorer? --> Windows + E.

Quickly open the "Run" box?  --> Windows + R.
 

And possibly the most useful command (which comes closest to the traditional Start menu): The Windows Tools menu --> Windows + X.