Friday, January 3, 2014

Howto: Upgrade SCCM 2012 RTM to R2 - Part 1

Howto: Upgrade SCCM 2012 RTM to R2 - Part 1

In this series of blogs I'll explain the steps that need to be taken to upgrade your SCCM 2012 environment successfully to the latest version - R2.
Take note that their will be a lot of screenshots and text, that is why it's split up in multiple parts. It's only possible to migrate from RTM to R2 by first upgrading to SP1. You cannot upgrade directly! So this blog is about upgrading to SP1.

First off, I recommend you to check this checklist for prerequisites prior to upgrading your SCCM 2012 environment:
http://technet.microsoft.com/en-us/library/jj822981.aspx#BKMK_UpgradeSP1Checklist

Once you've checked this checklist, we can start.
In the example, we have a server which is running SCCM 2012 RTM, with MDT 2012 and SQL 2008 R2.

Step 1: Make sure there is a backup or snapshot of your server. If this is the case, you can continue.
Step 2: We start off with upgrading the SQL server by installing SP2. Start the setup.exe.
Step 3: Setup will check the system if it meets all the requirements.
Step 4: Once the check is complete, the screen should look like this:
Step 5: Click Next. In the following screen, set the checkbox for 'I accept the license terms' and click on next.
Step 6: Check 'MSSQLSERVER, and click Next
Step 7: Setup will check if there are any files in use:
Step 8: Once completed, click Next
Step 9: You will see a summary of the update. Click Update to start
Step 10: You can view the progress
Step 11: Once complete, Setup will notify you. Click Close.
Step 12: Next we will install Cumulative Update 8 (CU8 / KB2871401)


Step 13: Once the files are unzipped, click Ok
Step 14: Open the setup to start the installation of CU8
Step 15: Again here will be a rule check
Step 16: Accept the license agreement terms
Step 17: Select the instance you want to upgrade

Step 18: Wait for the files in use check to finish

Step 19: Ready to update, click on Update to start
Step 20: Monitor the progress of the update


 Step 21: Once finished, Setup will inform you. Click Close
Step 22: Next we will let Windows Update check if there are more updates that need to run.


Step 23: When done, restart the server.
Step 24: Next we remove the Windows Automated Installation Kit (WAIK)


Step 25: Once removed, we can start the installation of Windows ADK


Step 26: Next we will install SP2 for WSUS 3.0 and the other hotfixes (KB2720211, KB2734608, KB2828185)


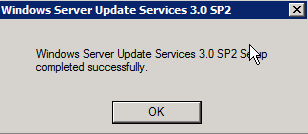
 Step 27: Now we will let the SCCM SP1 setup prerequisite check run (don't run setup but open it from the SMSSETUP\BIN\X64 folder


 Step 28: Once the prerequisites have passed, you can start setup by running splash.hta


Step 29: Use CMTrace to check if the upgrade has been successful.

Step 30: Install the KB2801987 update


Once done, the upgrade to SP1 has finished! The next blog we will talk about upgrading SP1 to R2.


Thursday, November 28, 2013

Top 5 new features in Windows 8.1


Windows 8.1 is RTM


Windows 8.1 is out now for a couple of weeks.

So what has been changed in Windows 8.1 in regards to its predecessor Windows 8? Below you will find a top 5 listed!

On 1: The Start button has returned!

1. Start ButtonOn of the big boos of the users that migrated to Windows 8 was the missing Star button. Now in Windows 8.1 it has returned. However, notice that it's only the button. The old-skool menu hasn't returned, it still opens the Metro UI Start menu.


Also when you rightclick the start button, it opens a new small start menu, which is similar to the Windows + X shortcut you could use in Windows 8.

On 2: Boot to desktop


2. Boot to Desktop Another option is to boot directly to the desktop after the computer has started, instead of showing the Metro UI Start menu. This was also a wish of the old skool users, which were used to the Desktop.


On 3: ImprovedSearch

 
The search possibilities have been improved greatly in Windows 8.1. When you search for certain things, the relevant links will be shown directly. Also the apps that can be used to open it will be showed directly. For instance, Media Player to open music or Internet Explorer to open the links.
 

On 4: More possibilities for showing windows

There are now more possibilities in showing content on your screen. It can be split in half, or with a sidebar (1/4 and 3/4 of your screen). If you own a multi-monitor display setup, it is now possible to show 8 apps at a time. 4. More Windowing Options for New-Style Apps
 

 On 5: More robust settings

There are more settings available in the PC settings menu then previously. Think about settings to change for your Display, mouse, keyboard, autoplay, account etcetera. Also, you can find CPU / Memory information, and much much more! 6. More Robust Settings in Modern Interface

Thursday, April 11, 2013

Websecurify | Blog: Introducing Panic Mode

Websecurify | Blog: Introducing Panic Mode: Simply put, Panic Mode is an extension for Chrome and soon for Firefox, which allows you stay secure online. When you turn it on, all ht...

Useful tool to browse with SSL in Chrome and Firefox. Can be really usefull when using public Wifi Hotspots, like for instance on an airport or at McDonalds or an Internet café. Handige

Thursday, April 4, 2013

Hyper-V>> Save diskspace using a differencing disk

In the last blog, there is explained how to create a virtual machine. In this blog we'll talk about creating a differencing disk. 

What is a differencing disk?

A differencing disk is a disk that's based on a so called parent disk. This parent disk can be a sysprepped image of Windows 7/8/2008/2012 or another OS. It can also be just a plain simple image of another machine. The differencing disk uses this parent disk, and saves only the differences in it's own disk. This way you can create lots of machines that are based on the same parent disk. The performance will be a little less good then normally, but it's still workable. However, because you'll need less snapshots and initial disks, the free disk space on your storage will be better. The snapshots you will make will also be smaller. 

How do I create a differencing disk?


1. First, make a new VM. See my previous blog for the steps that need to be taken to achieve this.

2. Give the VM a fitting name.
 
 
3. Choose 'Attach a virtual hard disk later' and finish the wizard.


4. You will return to the Hyper-V Manager. Right click, and choose Settings. THe screen below will appear. Go to IDE Controller 0 in the left pane, and click on Add.
 
 
 5. You will see the following screen. Now click on New.


 6. Click Next. The following screen will appear. Choose VHDX. Take notice that this format is only compatible with Windows 8 and newer.
 7. Click Next again, and now you can choose the type of disk. Choose for differencing disk.


8. Give the disk a recognizable name, and click on Next. 
 
 
9. Choose the parent disk in the next screen. In this particular case, I've chosen a sysprepped Windows 7 disk.


10. Click again on next, and check the summary to see if everything is OK. When this is the case, click Finish. 
 

Note: You can check if the disk really is a differencing disk using Powershell. You can also check this in the properties of the disk. 

Wednesday, April 3, 2013

Hyper-V - How to create a virtual machine

This blog describes the steps on how to create a virtual machine in Hyper-V. See this blog for more information on enabling Hyper-V in Windows 8. 

The required steps are the following:

1. Open the Hyper-V Manager using the start menu (type 'Hyper-V').

2. The Hyper-V Manager is opened. Go to Actions, to create a new virtual machine:
3. A wizard will appear. Click Next on the first screen. On the second screen you can give your virtual machine a name:
 
 
4. After giving the VM a name, click next to get the next screen. Here you can assign the amount of startup memory for your machine. We have chosen for 2 GB in the example.

 
5. Click Next again and Next to set an optional networkconnection (these settings can be altered later on if neccessary).
 
 
6. Click Next again to setup the settings for your virtual hard drive.
 
 
7. Again click next to setup the installation options. You can choose to boot from the network, load an iso or other bootable media, or to skip this step for now.  
 
 
8. Click next again for a summary of your settings, and click finish to end the wizard. 

 
9. You will return to the Hyper-V Manager. Here you will find an overview of all your virtual machines. Right-click your created machine, and click on Connect...
10. Now you will see the screen below. Here you can start, inspect, shut down and snapshot your virtual machine.


11. Press the on/off switch to start the computer. With the 'media' menu you can insert an iso to install Windows or Linux(as an example)


Free Hyper-V in Windows 8! How do I enable this?

Like some of you might already know, Hyper-V is a free feature in Windows 8 nowadays! This will save you an expensive VMWare license. The only thing what you need is to activate the feature (and also you'll need a computer with VT technology). Here's how:

1. Go to the Control panel, and browse to Programs and Features. 
   
2. Choose "Turn Windows features on or off"


3. Check the box in front of Hyper-V, and klik OK. Navigate through all the questions, and reboot your computer at the end when asked.


4. Once booted back up, you can find the Hyper-V applications in your Start Menu, when looking for "Hyper". Here is what you will see:
 
With the Hyper-V Manager you can create and manage new VM's!